


The Turkey has entered the building...
Full turkey recipe filled with all the tips, tricks and explanations

It’s turkey time 🦃
We are officially less than a week away from THE foodie holiday of the year - Thanksgiving. And when we think of Thanksgiving, the one dish that classically comes to mind has to be roasted Turkey. It is a STAPLE of the table, even if you’re like me and actually prefer the sides.
This year, I made it my mission to figure out the best way to make the bird so that it would hit my top three criteria:
Super flavorful
Ultra moist
& a beautiful golden exterior
I spent a lot of time researching various different methods, techniques, tips and tricks and what I landed on was my own creation using a combination of techniques with an emphasis on keeping it as simple & low equipment as possible. So let’s get into it….

Ingredients
12 - 15lb Turkey (bigger can work too, just need further adjustments to the brining amounts and cook time…guides included below)
1 stick butter
1 package rosemary, divided
1 package thyme, divided
4 cloves garlic
1-2 tbsp olive oil
1/2 cup Kosher salt (I use Diamond Crystal)
2 tbsp brown sugar
2 small onions
2 small apples
1/2 cup mayo
1/2 cup white wine
1-2 cups chicken or turkey stock
Step 1 - the night before
This recipe starts the night before as we begin with buttering and dry brining the bird. As much as I tried to keep it to the same day preparation, there is truly no better way than starting the process a bit early to ensure max flavor penetration and juiciness.
Dry vs Wet brine
Wet brine - this is the most classic way to brine. It is done by creating a large water-based mixture of water and salt, which you’ll submerge the turkey in so that it infuses it with moisture, seasoning and flavor. While the meat is succulent, the skin tends to be less crisp from excess moisture. PLUS, making space for a large bird in a personal bath can be quite challenging - not the mention pretty unappealing (who wants to deal with a large, wet & slimy bird and its bath water.)
Dry brine - is a salt based seasoning mix that is rubbed onto the surface of the bird and then allowed to rest uncovered in the fridge, allowing the skin to dry out and crisp beautifully in the oven. Additionally, dry-brining ensures the turkey meat is penetrated with seasoning throughout. The salt draws out moisture from the turkey, causing the salt to dissolve. Once dissolved, the salt combines with those turkey juices and gets reabsorbed into the meat.
After assessing these two methods, I went with the dry brine because first of all I did not want to deal with transporting and storing the turkey in a large container AND I wanted to ensure the crispy skin.
The process:
Before adding my dry brine, I wanted to get some fat and flavor under the skin. Trying to add butter or flavorings under the skin after the brining period would cause a disruption to the skin, removing salt and the drying out process it just went though.
To prevent any large pieces of garlic/herb from burning or showing up over or under the skin, I choose to blend up the aromatic with a touch of oil (just so that it will blend) before adding it to my compound butter.
In a blender, combine the leaves of 3 sprigs of rosemary, 3 sprigs of thyme, and 4 roughly chopped garlic cloves*. Starting with only 1 tbsp of olive oil, blend until a uniform herb mixture without any large pieces forms (add more oil in small increments as necessary until it is smooth.)
*Feel free to adjust this to your preferences. Add your fav herbs, seasonings etc.*
Add the aromatic mixture into a small bowl with softened butter. Stir well until evenly incorporated.
In another bowl, combine 1/2 cup of kosher salt and 2 tbsp of brown sugar until evenly mixed.
(Figure 2–2½ tsp. of Diamond Crystal kosher salt per pound of turkey, or 1–1½ tsp. per pound of Morton kosher salt. The brown sugar is not necessary BUT it will infuse the meat with a little sweetness and help the skin turn golden in the oven. Your sugar measurement should equal about ¼ of your salt measurement)
Remove your turkey from all packaging and remove all giblets & neck, and trim any excessive fat. Use paper towels to dry the outside and inside of the turkey very well. Place the turkey on a sheet tray with a rack.
Gently separate the skin of the turkey from the breasts and legs. Working in batches, scoop handfuls of the butter under the skin and gently massage to evenly disperse.
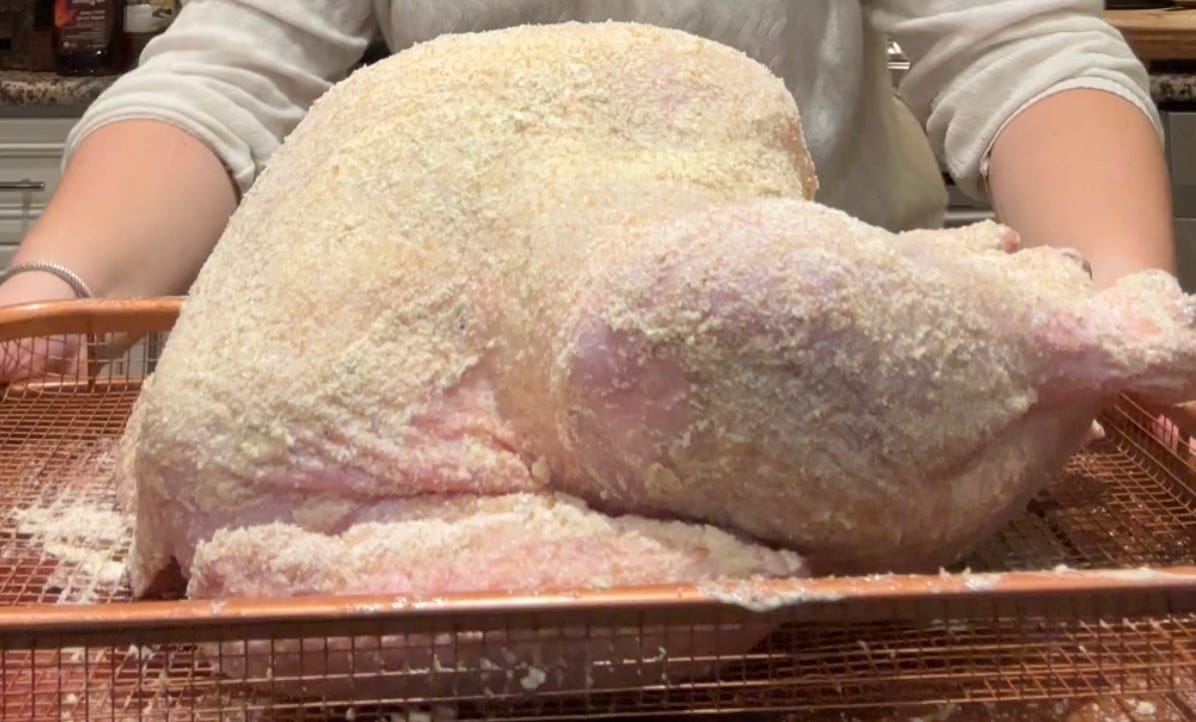
Next, begin sprinkling the salt mixture ALL over the turkey. Make sure to get inside the crevices and the cavity as well, try not to miss an inch & get those wings!! Also, try not to rub it in with the your hands as the salt will fall off, instead gently pat it into the skin. Transfer the buttered and salted bird into a refrigerator uncovered and leave it for 12-24 hours.
Step 2 - the day of
Okay, today is the day!! Time to roast off the beautiful bird. Luckily most of the work was done yesterday so today will be easier - giving you time to get everything else set.
Remove the bird from the fridge and place it onto its final roasting pan (I highly recommend cooking it on a roasting pan with a rack..so all those juices fall below.) While it comes to room temperature, preheat the oven to 425 degree F and grab the apples, onions, herbs (I used a bunch of rosemary and thyme) and mayo.
Slice the onions in half and remove the skin, and halve and core the apples. Stuff the cavity of the bird with the herbs first, followed by all but 2-3 halves of the onions and apples. Place the final 2-3 halves rounded side up in the front of the turkey (likely where the packet of giblets were) so that the area is filled out and is no longer hallow. Tie the legs of the turkey together with kitchen twine.
Place the mayo into a small bowl, grab a brush and begin gently brushing the mayo onto the entire surface of the turkey. Make sure to not disrupt any salt on the surface that remains, be gentle. Ensure every exposed inch of the turkey skin is brushed with the mayo.
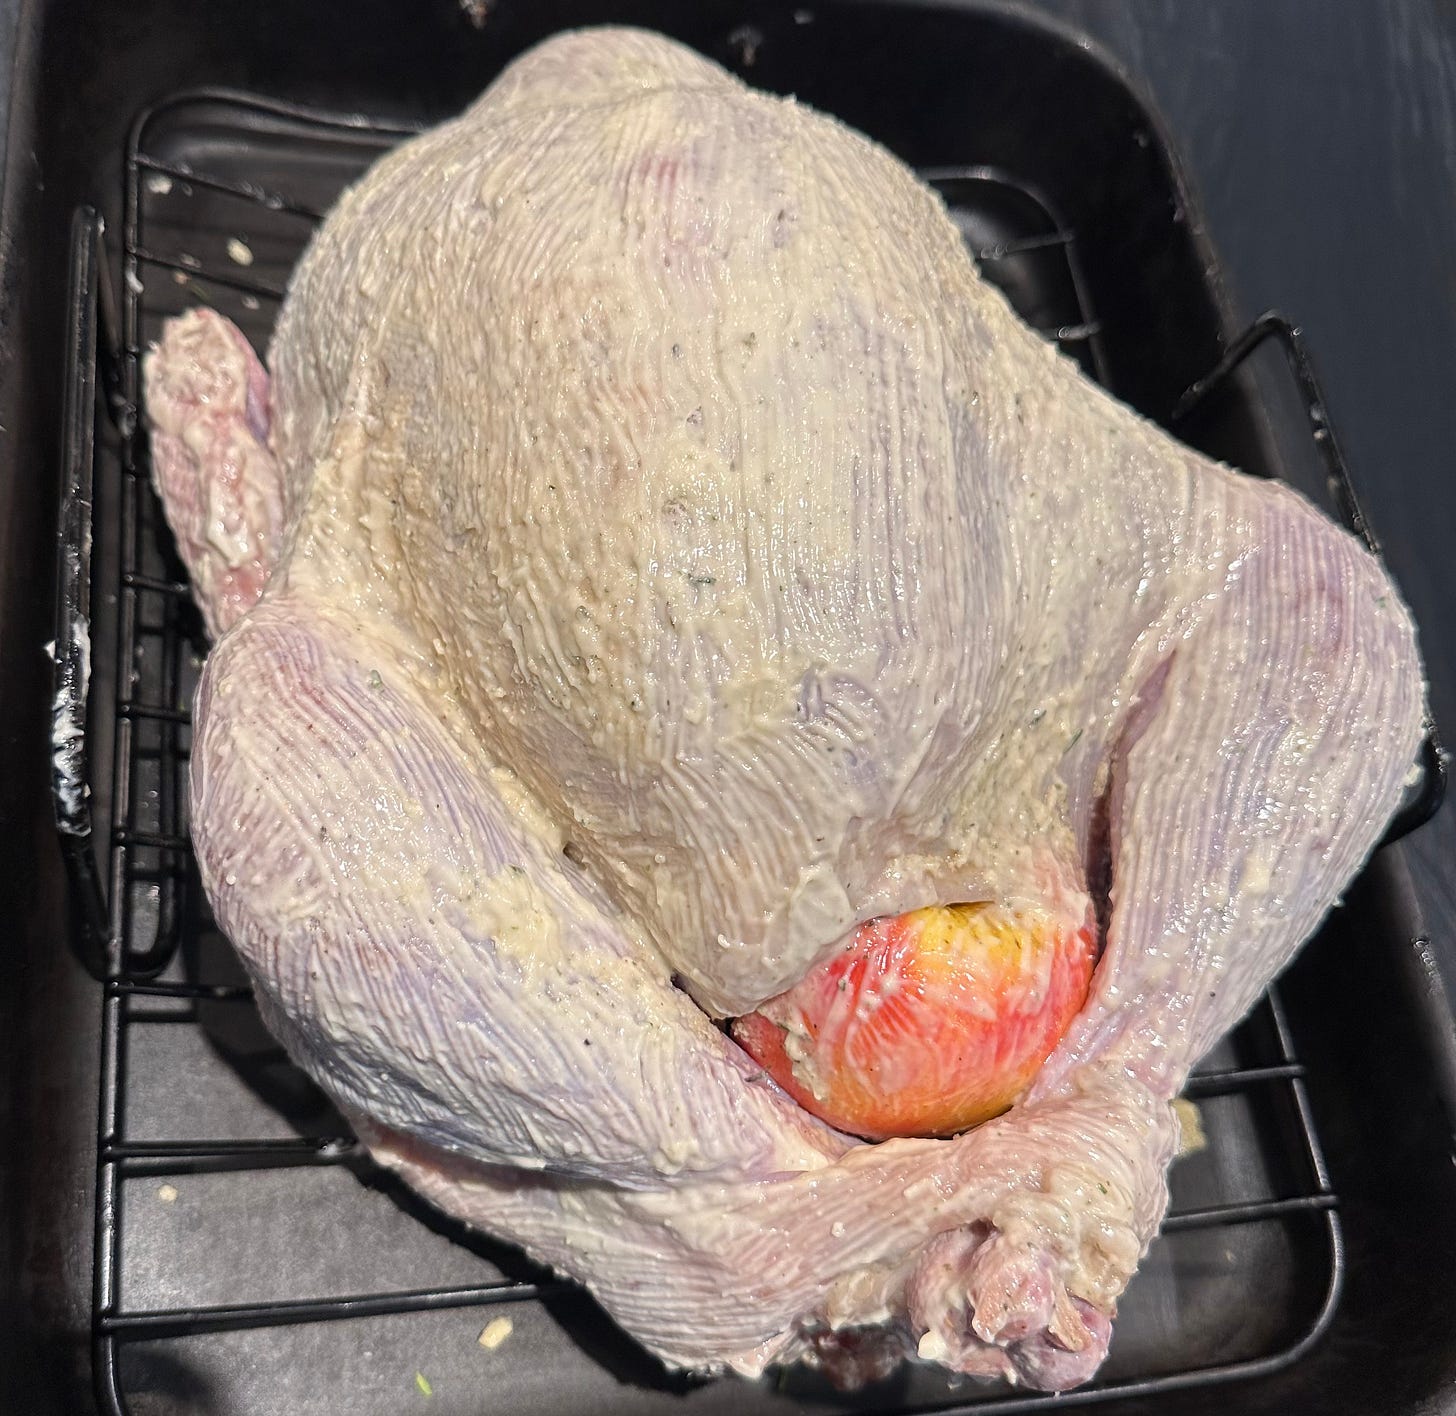
Mayo brushed stuffed turkey ready for the oven. WHY MAYO?
Now if you’re sitting here wondering why the f**k I just said to add mayo, hear me out. Mayo has the perfect spreadable consistency that won’t interfere with the salt coat, AND it is going to help us get that beautiful golden crispy skin while keeping the meat extra moist. Oh and it also means we have to spent less time basting it…HUGH SCORE!!! If you’re still not convinced, think about how people spread mayo on the outside of bread for grilled cheese….perfect every time!
Place the turkey uncovered into the oven for 30 minutes, rotating halfway to ensure even browning. This is to give that first initial crust on the skin of the turkey.
After 30 min, remove the turkey, reduce the temperature to 350 degrees F. Use tin foil to cover the breasts and wings of the turkey. Pour in the wine and half of the stock to the bottom of the pan. Return the bird to the oven for one hour and 15 mins**.
**For birds of various sides, figure about 12 minutes per pound for an unstuffed bird. Remove the foil from the breast in the last half hour so it browns.**
After the 75 minutes, remove the foil and spoon on some of the pan drippings to the breast. Add more stock to the pan as necessary to ensure it is not dried out. Place back into the oven for 30 mins.
After 30 minutes, begin checking the temperature of the bird. I shoot for the range 155-160 F, knowing that carry over cooking will bring the bird to it’s final temperature. Once you hit the correct temperature, move the bird with the rack to another tray and loosely cover with tin foil. Pour out all of the pan drippings into a measuring cup and reserve to make gravy.
After at least 15 minutes (ideally 30 min) of resting. Slice into your beautiful bird and enjoy with family or friends!!!

Got a question? Don’t be shy, send me over a message and I’d be happy to help. Also, if you choose this method PLEASE keep me posted on how it turns out and send pics!!
I used all 1/2 cup of kosher brining Salt for a 12 lbs bird and now reading other recipes I think I used too much. It’ll be brining for 18 hours when all is said and done. I just scraped some off after an hour brining. What size was your bird and was it too salty?
Turkey came out so good! I will use this recipe again next year! I used all 1/2 cup of salt brine initially. Then got scared it was too much and scraped some off. I could have left it but it was so good. I let it sit in the fridge for 18 hours total. I also skimped a tad on the mayo but next time won’t it’s a game changer! Thanks for the recipe!